Step One: Generating a CSR key
- CSR Generation
- Configuration
- Validation
- Issuance
- Installation
- Site Seal Installation
To start the Configuration Process, a Certificate Signing Request (CSR) Key must be created via the web server hosting your website.
A CSR Key is a block of text that serves as a thumbprint of your web server and your contact information. Every CSR Key is unique.

A CSR Key is created in the Control Panel of your website hosting. The specific steps to create a CSR Key differ from one provider to another, but all adhere to the same general concepts.
Steps to Generate A CSR KEY ON Webnames Hosting
Setps to Generate A CSR KEY ON OTHER HOSTING PROVIDERS
Webnames Hosting
A special note for our Webnames Web Hosting customers: In addition to the manual SSL Certificate installation steps outlined below, all Webnames web hosting customers can take advantage of AutoInstall SSL within our Web Hosting packages. AutoInstall SSL allows for the configuration, validation, issuance and installation of SSL certificates in a few easy steps.
To generate a CSR key manually from within the wEBNAMES Hosting Control Panel
- Log into your Webnames account at https://webnames.ca
- Browse to My Account > Manage > Web Hosting
- Click on your domain name
- Click on the Hosting Tab
- Under the Hosting Logins heading, click on Login for the Hosting Control Panel
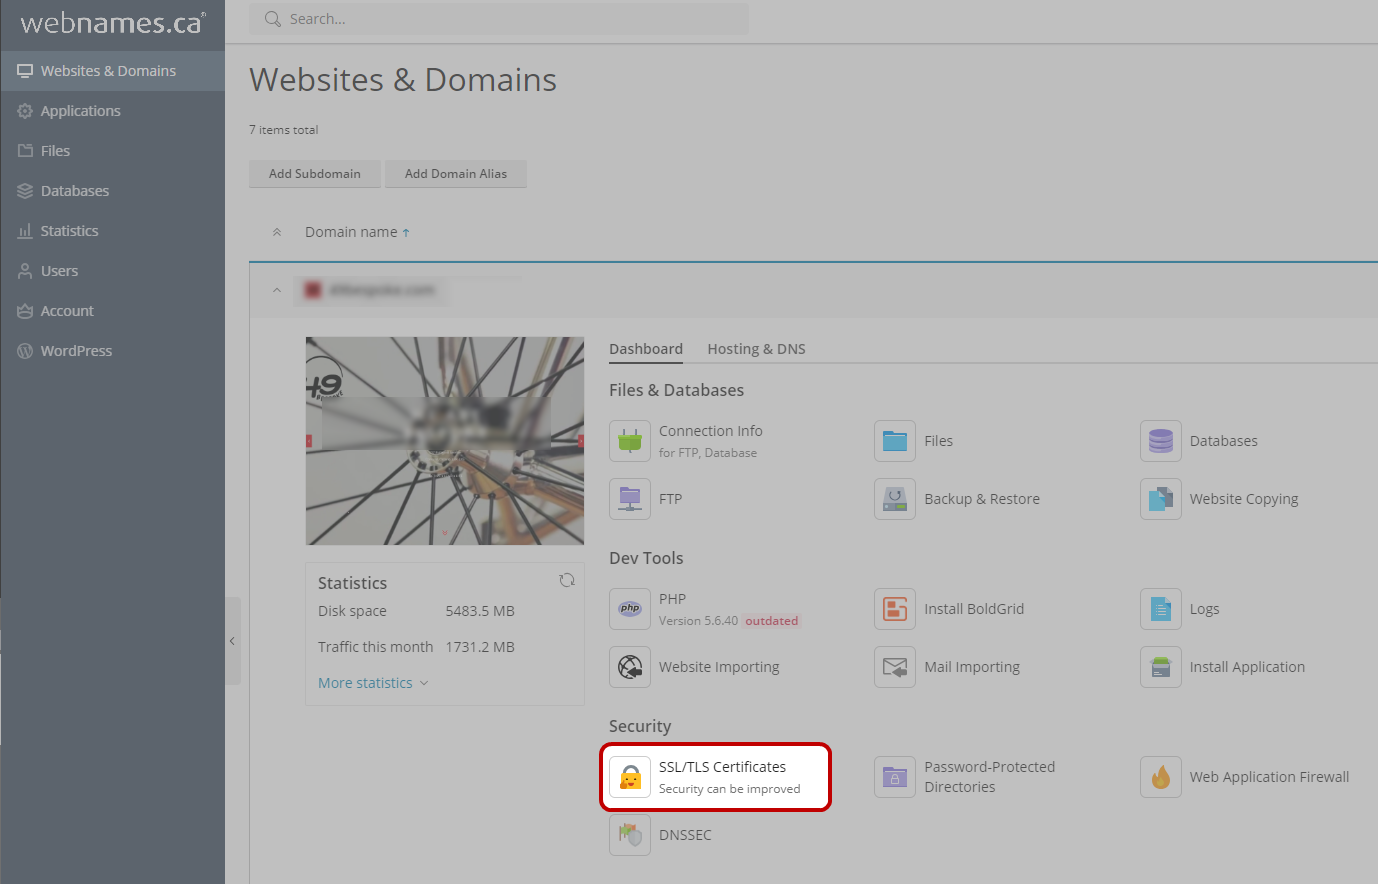
- Once logged in, go to theWebsites & Domains and click onSSL/TLS Certificates.
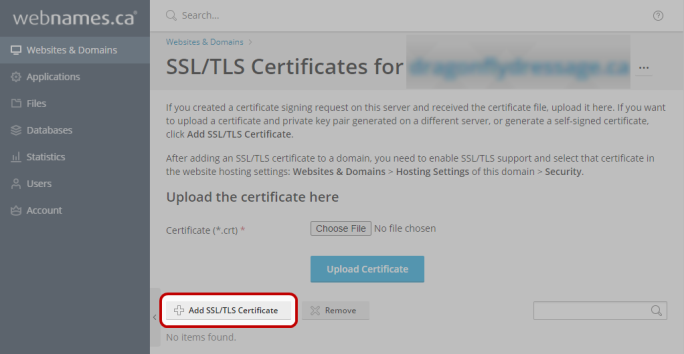
- Click the Manage button.
- Click the Add SSL/TLS Certificate button.
- Specify the following certificate parameters:
- Certificate name: This is a label of your own choosing and will help you identify this certificate should you have more than one in the future.
- Bits: This value controls the strength of the encryption algorithm used to create your CSR Key. Bigger is better.
- Your location and organization name: These are required fields and should not exceed the length of 64 characters.
- The corresponding domain name for this SSL certificate. IT is critical that spelling etc be 100% accurate in this field. Example: yourdomain.com
- The website administrator's (or your) e-mail address.
|
NOTE: Your choice of domain name is critical, and cannot be changed later. Generally speaking, www should not be included in the domain name you specify, since this variation of domain name will automatically be included as an alternative name (SAN) for your SSL certificate. Example: A certificate configured for yourdomain.com will also automatically work for www.yourdomain.com, however the opposite is not true - A certificate for www.yourdomain.com will not work for yourdomain.com |
- Make sure that all the provided information is correct and accurate. This information should match the WHOIS information for the corresponding domain name.
- Click Request. The hosting server will generate your private key and certificate signing request and add them to your certificates repository (Websites & Domains > SSL Certificates).

- In the list of certificates, click the name of the certificate you need.
- Locate the CSR section on the page, and copy the text that starts with the line and ends with the line to your clipboard.
- This CSR text will be required in the next step. Keep the window containing your CSR open, and proceed to the next step.
See also: Step Two: Configuring an SSL Certificate
OTHER HOSTING PROVIDERS
The required CSR key needs to be generated via same the Hosting Control Panel in which the resulting SSL Certificate will be installed.
Hosting Control Panels differ from one provider to another, however generally speaking you are looking to log into this Panel and locate the SSL section of your account. From there the first step to creating or adding a new SSL certificate should be the creation of a CSR Key.
When generating a CSR:
- Use two character abbreviations for both province/state and country
- The Organization name must be the full valid business or organization name
This CSR text will be required in the next step. Keep the window containing your CSR open, and proceed to the next step.
| NOTE: For Extended Validation SSL certificates, the physical address on the domain's registrant profile must match the province/state and country of the CSR |
See also: Step Two: Configuring an SSL Certificate
See Also