Panel as a Master DNS Server
For each new domain name, the Panel automatically creates a DNS![]() The Domain Name System (DNS) is a hierarchical distributed naming system for computers, services, or any resource connected to the Internet or a private network. It associates various information with domain names assigned to each of the participating entities. A Domain Name Service resolves queries for these names into IP addresses for the purpose of locating computer services and devices worldwide. By providing a worldwide, distributed keyword-based redirection service, the Domain Name System is an essential component of the functionality of the Internet. zone in accordance with the settings configured by your service provider. The domain names should work fine with the automatic configuration, however, if you need to perform custom modifications in the domain name zone, you can do that through your Panel.
The Domain Name System (DNS) is a hierarchical distributed naming system for computers, services, or any resource connected to the Internet or a private network. It associates various information with domain names assigned to each of the participating entities. A Domain Name Service resolves queries for these names into IP addresses for the purpose of locating computer services and devices worldwide. By providing a worldwide, distributed keyword-based redirection service, the Domain Name System is an essential component of the functionality of the Internet. zone in accordance with the settings configured by your service provider. The domain names should work fine with the automatic configuration, however, if you need to perform custom modifications in the domain name zone, you can do that through your Panel.
To view the resource records in a DNS zone of a domain:
- Go to the Websites & Domains tab > DNS Settings.
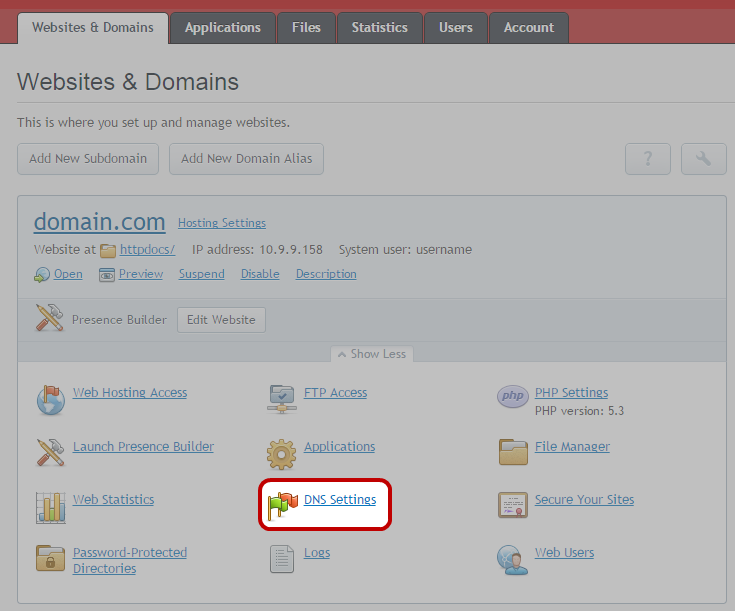
- If you have several domain names, select the domain name whose DNS settings you want to view.
A screen will show all resource records for a given domain.
To add a new resource record to the zone:
- Go to the Websites & Domains tab > DNS Settings
- .If you have several domain names, select the domain name whose DNS settings you want to manage.
- Click Add Record.
- Select a resource record type, and specify the appropriate data:
- For an NS record
 NS Resource Records are records in the DNS database to determine which authorative name servers are used for the domain., which specifies the domain name of a name server In computing, a name server is a computer server that hosts a network service for providing responses to queries against a directory service. It maps a human-recognizable identifier to a system-internal, often numeric, identification or addressing component. This service is performed by the server according to a network service protocol. that is responsible for a DNS zone of a domain, you need to specify the domain name (or a subdomain), and then the corresponding name server's domain name. If you are defining an NS record for your main domain, then you should leave the domain name field empty. If you are defining a name server for a subdomain, then type the subdomain into the domain name field. After that, type the appropriate name server's domain name into the name server field. For example: ns1.mynameserver.com.
 - For anA record The A-record is used to translate human friendly domain names such as "www.example.com" into IP-addresses such as 23.211.43.53 (machine friendly numbers). as well as AAAA record An AAAA-record is used to specify the IPv6 address for a host (equivalent of the A-record type for IPv4).
IPv6 is the future replacement for the current IP address system (also known as IPv4)., which associate IP addresses with domain names, you need to specify the domain name and IP address An Internet Protocol address (IP address) is a numerical label assigned to each device (e.g., computer, printer) participating in a computer network that uses the Internet Protocol for communication. An IP address serves two principal functions: host or network interface identification and location addressing. If you are simply defining a record for your main domain, then you should leave the domain name field empty. If you are defining a record for a name server, then type ns1 or ns2 into the domain name field. Then specify the appropriate IP address with which to associate the domain name.
- For a CNAME record CNAME-records are domain name aliases.
To mask this, CNAME-records can be used to give a single computer multiple names (aliases)., which specifies which subdomains (or domain aliases that look like subdomains, for example, www) should be associated in the Domain Name A domain name is an identification string that defines a realm of administrative autonomy, authority, or control on the Internet. Domain names are formed by the rules and procedures of the Domain Name System (DNS). System with the main domain address, you need to type the subdomain name or www alias, and then, the main domain name.
- For an MX record MX-records are used to specify the e-mail server(s) responsible for a domain name.
Each MX-record points to the name of an e-mail server and holds a preference number for that server., which specifies the host name of the preferred mail server for the given domain, you need to specify the mail domain (or subdomain), the domain name of the mail exchange server responsible for receiving e-mail, and the server's priority. For the main domain, you would simply leave the available field blank. Then type the domain name of your mail server. If you are running a remote mail server named 'mail.myhostname.com', then simply type 'mail.myhostname.com' into the Mail exchange server field. After that, specify its priority: 0 is the highest and 50 is the lowest.
- For a PTR record A PTR (Pointer) record is a type of DNS record used for reverse DNS lookups. It maps an IP address to a domain name, essentially the opposite of an A record, which maps a domain name to an IP address., which is required for reverse DNS lookup (an IP address is translated to domain name), you need to enter the IP address/mask, and then type the appropriate domain name for this IP address to be translated to.
- For a TXT record TXT-records are used to hold descriptive text.
They are often used to hold general information about a domain name such as who is hosting it, contact person, phone numbers, etc.
One common use of TXT-records is for SPF (see http://www.openspf.org).
This is however gradually being replaced by the new SPF-record type., which is used for specifying arbitrary human-readable text, you can type an arbitrary text string, or an SPF record TXT-records are used to hold descriptive text.
One common use of TXT-records is for SPF (see http://www.openspf.org)..
- For an SRV record A Service record (SRV record) is a specification of data in the Domain Name System defining the location, i.e. the hostname and port number, of servers for specified services. It is defined in RFC 2782, and its type code is 33. Some Internet protocols such as the Session Initiation Protocol (SIP) and the Extensible Messaging and Presence Protocol (XMPP) often require SRV support by network elements., which is used for specifying location of services other than mail, you will need to enter the service name, protocol name, port number, and target host. Service and protocol names should start with the underscore symbol. You can also specify the priority of the target host, and relative weight (for records with the same priority) in the appropriate fields.
- Click OK, and then click Update.
To modify the properties of a resource record:
- Go to the Websites & Domains tab > DNS Settings.
- If you have several domain names, select the domain name whose DNS settings you want to manage.
- Click the hyperlink in the Host column corresponding to the resource record you want to modify.
- Modify the record as required, click OK, and then click Update.
In addition to the resource records described above, there is also a Start of Authority record. This record indicates that this DNS name server is responsible for the domain's DNS zone. It also contains settings that affect propagation of information about the DNS zone in the Domain Name System.
To modify the entries in the Start of Authority (SOA) record for a domain:
- Go to the Websites & Domains tab > DNS Settings.
- If you have several domain names, select the domain name whose DNS settings you want to manage.
- Click SOA Record.
- Specify the required values:◦Refresh interval. This is how often the secondary name servers check with the master name server to see if any changes have been made to the domain's zone file. The Panel sets the default value of three hours.
- Retry interval. This is the time a secondary server waits before retrying a failed zone transfer. This time is typically less than the refresh interval. The Panel sets the default value of one hour.
- Expire interval. This is the time before a secondary server stops responding to queries, after a lapsed refresh interval where the zone was not refreshed or updated. The Panel sets the default value of one week.
- Minimum TTL Time to live (TTL) is a mechanism that limits the lifespan of data in a computer or network. Shorter TTLs can cause heavier loads on an authoritative nameserver, but can be useful when changing the address of critical services like Web servers or MX records, and therefore are often lowered by the DNS administrator prior to a service being moved, in order to minimize disruptions.. This is the time a secondary server should cache a negative response. The Panel sets the default value of three hours.
- Default TTL. This is the amount of time that other DNS servers should store the record in a cache. The Panel sets the default value of one day.
- Click OK, and then click Update.
Usage of serial number format recommended by IETF and RIPE is mandatory for many domains registered in some high-level DNS zones, mostly European ones. If your domain is registered in one of these zones and your registrar refuses your SOA serial number, using serial number format recommended by IETF and RIPE should resolve this issue.
The Panel-managed servers use UNIX timestamp syntax for configuring DNS zones. UNIX timestamp is the number of seconds since January 1, 1970 (Unix Epoch). The 32-bit timestamp will overflow by July 8, 2038.
Webnames recommends using YYYYMMDDNN format, where YYYY is year (four digits), MM is month (two digits), DD is day of month (two digits) and NN is version per day (two digits). The YYYYMMDDNN format will not overflow until the year 4294.
To change the Start of Authority (SOA) serial number format to YYYYMMDDNN for a domain:
| Note: Do NOT under any circumstances change the Start of Authority (SOA) serial number format. The new server DNS will only work with the default UNIX timestamp serial number. Once again, do NOT change this setting. |
To remove a resource record from the zone:
- Go to the Websites & Domains tab > DNS Settings.
- If you have several domain names, select the domain name whose DNS settings you want to manage.
- Select a checkbox corresponding to the record you want to remove.
- Click Remove.
- Confirm removal, click OK, and then click Update.
To restore the original zone configuration in accordance with the default DNS template settings used on the server:
- Go to the Websites & Domains tab > DNS Settings.
- If you have several domain names, select the domain name whose DNS settings you want to manage.
- Click Restore Defaults.
- In the IP address menu, select the IP address to be used for restoring the zone.
- Specify whether a www alias is required for the domain.
- Select the Confirm the restoration of the DNS zone checkbox, and click OK.
To restore the default Start of Authority (SOA) serial number format (UNIX timestamp) for a domain:
- Go to the Websites & Domains tab > DNS Settings.
- If you have several domain names, select the domain name whose DNS settings you want to manage.
- Click SOA Record.
- Clear the Use serial number format recommended by IETF and RIPE checkbox.
| Note: See the sample of SOA serial number generated with the selected format. If the resulting number is less than the current zone number, the modification may cause temporary malfunction of DNS for this domain. Zone updates may be invisible to the Internet users for some time. |
- Click OK, and then click Update.
By default, transfer of DNS zones is allowed only for the name servers designated by NS records contained within each zone. If you are using a Windows-based account, then you can change zone transfer settings.
If your domain name registrar requires that you allow transfer for all zones you serve:
- Go to the Websites & Domains tab > DNS Settings.
- If you have several domain names, select the domain name whose DNS settings you want to manage.
- Click Zone Transfers. A screen will show all hosts to which DNS zone transfers for all zones are allowed.
- Specify the registrar's IP or network address and click Add Network.