Calendar
The webmail Calendar App helps you to schedule your appointments and events in a single program. You can schedule appointments with your contacts, send event invitations and share calendars with other users.
Navigating the Calendar App
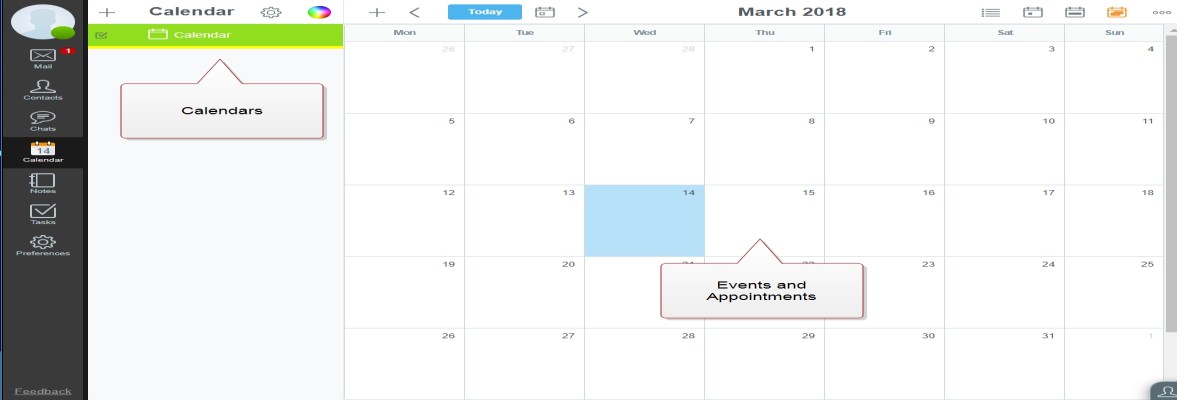
The calendar app window is divided into two panes:
- Your available calendars are listed in the left window pane.
- The events and appointments from the selected calendar(s) are displayed in the right window pane.
You can choose between a daily, weekly or monthly view for displaying the calendar.
To switch views simply click the appropriate button in the toolbar of the right pane: Daily, Weekly, Monthly.
Click Today to switch the date selection to the current day.
Use the arrows Previous and Next to browse through your calendar – depending on the chosen view between day, weeks or months.
The red line indicates the current time of day.

Basic settings
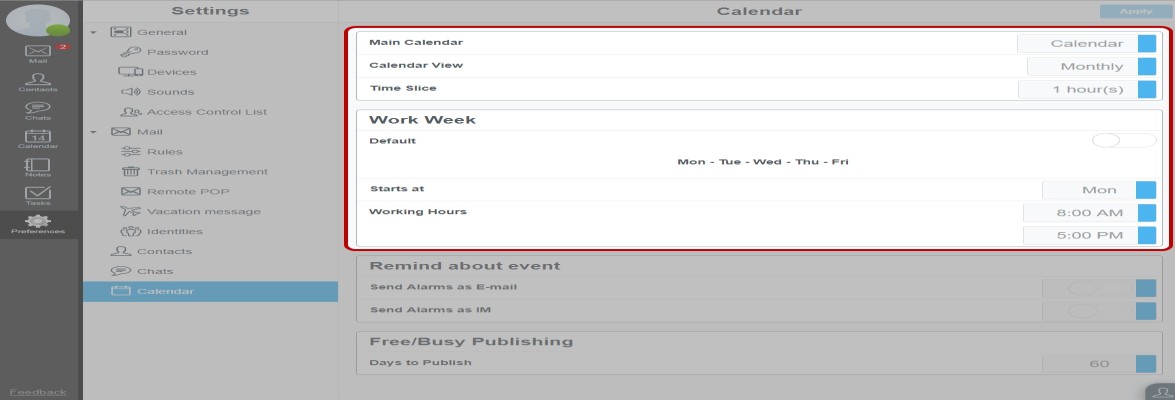
It is recommended to check and – if applicable – modify the basic settings in Preferences / Calendar of your Calendar App so the configuration matches your preferences.
- Main Calendar: Select the calendar that will be opened by default when you start the Calendar App.
- Calendar View: Select which view – day, week or month – will be shown by default.
- Starts at: Choose the first day of the week.
- Time slice: Select in which intervals a day will be divided into.
- Working hours: Select your typical working hours (from and to). The calendar view will by default show this part of the day.
While you are here you can also choose your preferred channel for being alerted about upcoming events:
- By Email
- By Instant Message
Simply set the switch to ON or OFF.
Remember to confirm your selections by clicking Save All Settings.
Creating an appointment
You can create an appointment in two ways:
- Click + in the calendar window.
Or
- Click directly into the calendar at the desired date and start time, hold the mouse button and drag to the end time. Then release the mouse button.
The window New Event will be opened.

To create the event:
- Enter a Subject. This will be the title shown in the calendar for your event.
- Select the start date and the end date of the event. To help you with this task a small calendar will pop up when clicking into the field from which you can choose the date.
- Select the start time and end time.
- Optionally enter text in Where and Description.
- In the select box Alarm choose if you want to be alerted and for how long in advance.
- Mark Private if this event should be hidden from other users.
- Confirm with Save.
The Event will be created and shown in your calendar.
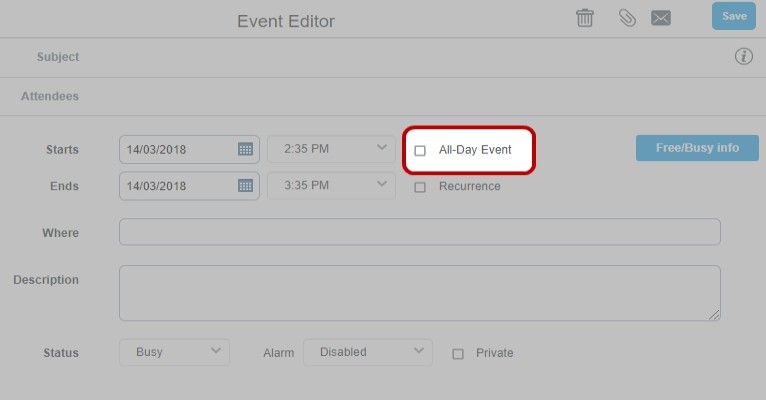
All-Day Event
If your Event is an all-day Event mark All-Day Event.
Recurring Events
You can create Recurring Events, e.g. for a Meeting that is held weekly at the same time each week.
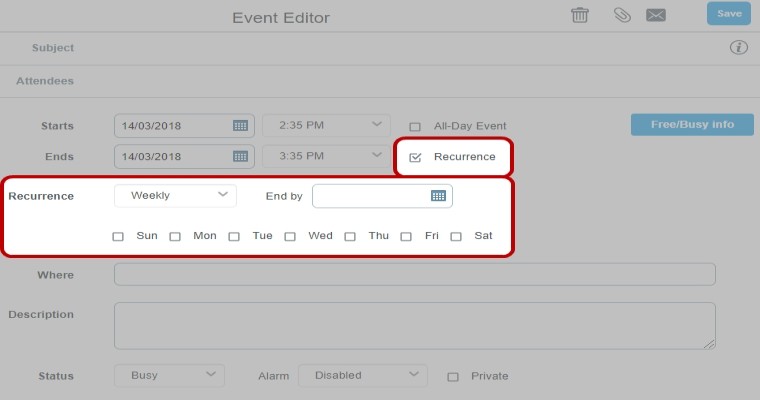
Mark Recurrence.
In the select box Recurrence choose the rhythm in which the Event will be repeated – daily, weekly, monthly, yearly...
Enter an End by date.
In Every … days enter the interval in which the Event will be repeated.
Click Save to finish creating the recurring event.
Attachments
You can attach one or more files to an event.
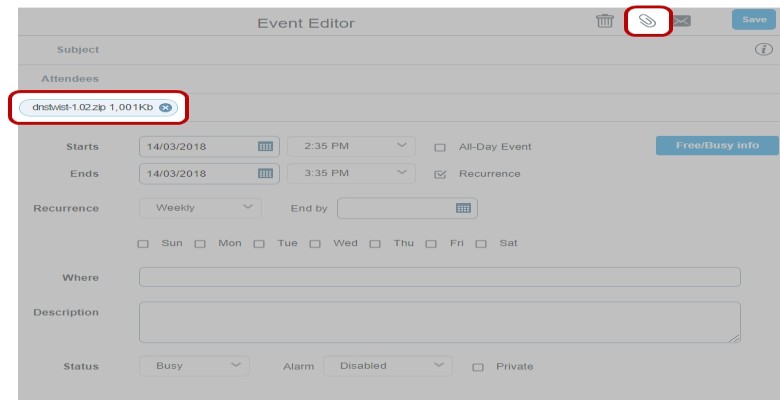
- In the window New Event click Attach file.
- Choose the file(s) from your computer and confirm.
- All attached files will be shown in the event window. You can open a file by clicking on it. You can delete a file by clicking X next to the file name.
- Confirm with Save.
The attached files will be shown in the preview window of the event. You can open the preview by simply clicking on the event object in the calendar.
High Priority Event
You can mark an event as a High Priority Event.
- In the window New Event click Priority (exclamation mark icon).
The icon will change to red color. After saving it will be shown in the calendar view next to the event title.

To remove the priority property click the icon again.
Editing an Event
There are two options for editing an existing event:
Use Drag+Drop to move the event to a different date or time:
- Click the event object.
- Drag it to its new position in the calendar view.
- Release the mouse button. The event has been moved to the new date/time.
Click on the event object and select Edit.
Quickly changing the event duration
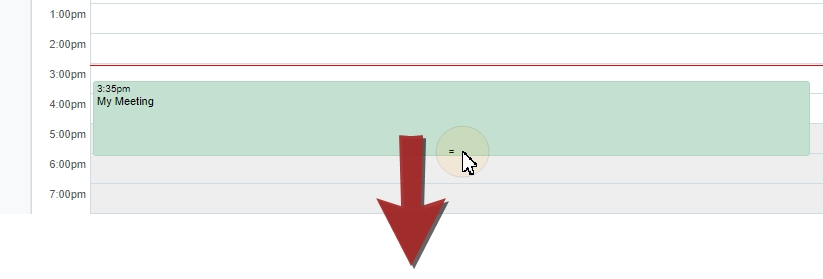
- With only one mouse click you can change the duration of an event by moving the end date/time:
- Hover the mouse button over the lower end of the event object in the calendar view until an arrow appears.
- Click and hold the mouse button and pull the lower edge of the event object to the end time desired: up to shorten the duration, down to extend the duration.
- Release the mouse button at the desired position.
Changing a series of events
When you open an event for editing that is part of a series of events (recurring appointment) you will be asked if you would like to edit only this specific event or all events in the series.
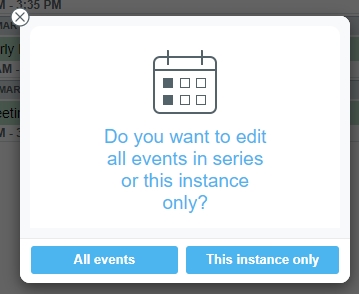
- Click All Events to edit the complete series of events and change settings.
- Click This Instance only to edit only this one event you selected.
When moving an event that belongs to a series to a different date or time (refer to the previous section on how to do that) you will be asked if you want to create an exception to the current series for the current instance.
Click Yes to create an exception. After that the current event will not belong to the original event series any more.
Click No to not having an exception created. Your recent change will be reverted.
Appointment Alarms
If you set an alarm time in an event you will be reminded before the appointment begins.
Depending on your calendar configuration you set in Preferences / Calendar you will be reminded by:
- Message box
- Instant Message in Chat
Deleting an event
To delete an event:
- Open the event.
- Click Edit.
- Click Delete (trash can icon)
- Confirm by clicking Delete.
When deleting a series of events you will be asked if you want to delete All events or This Instance only.